
It starts with a real-world problem
Most of the projects modern projects are now bootstrapped with Next.js As the ecosystem of tools grows, so does the burden of updating dependencies and making sure everything works as expected after the changes.
Recently I’ve been migrating my Next 13 project to Next 14, paired with a Sanity(CMS) update from some very old version to the bleeding edge one.
I was very careful to not break anything but still, the changes on our lost-pixel.com were quite vast and I had to make sure that no regressions popped up.
Fortunately enough I had visual regression testing set up on all of the generated pages, so the review was quite fast and simple. Of course I broke plenty of things while migrating, but none of that got released as those regressions were caught straight away.
In this step-by-step guide, I will show you how you can set up the Lost Pixel Platform to have the same level of security without manual checks at all!
Setup
We will start with a template to make the tutorial simpler, but you of course could integrate it with your existing project, the complexity of the integration won’t change much!
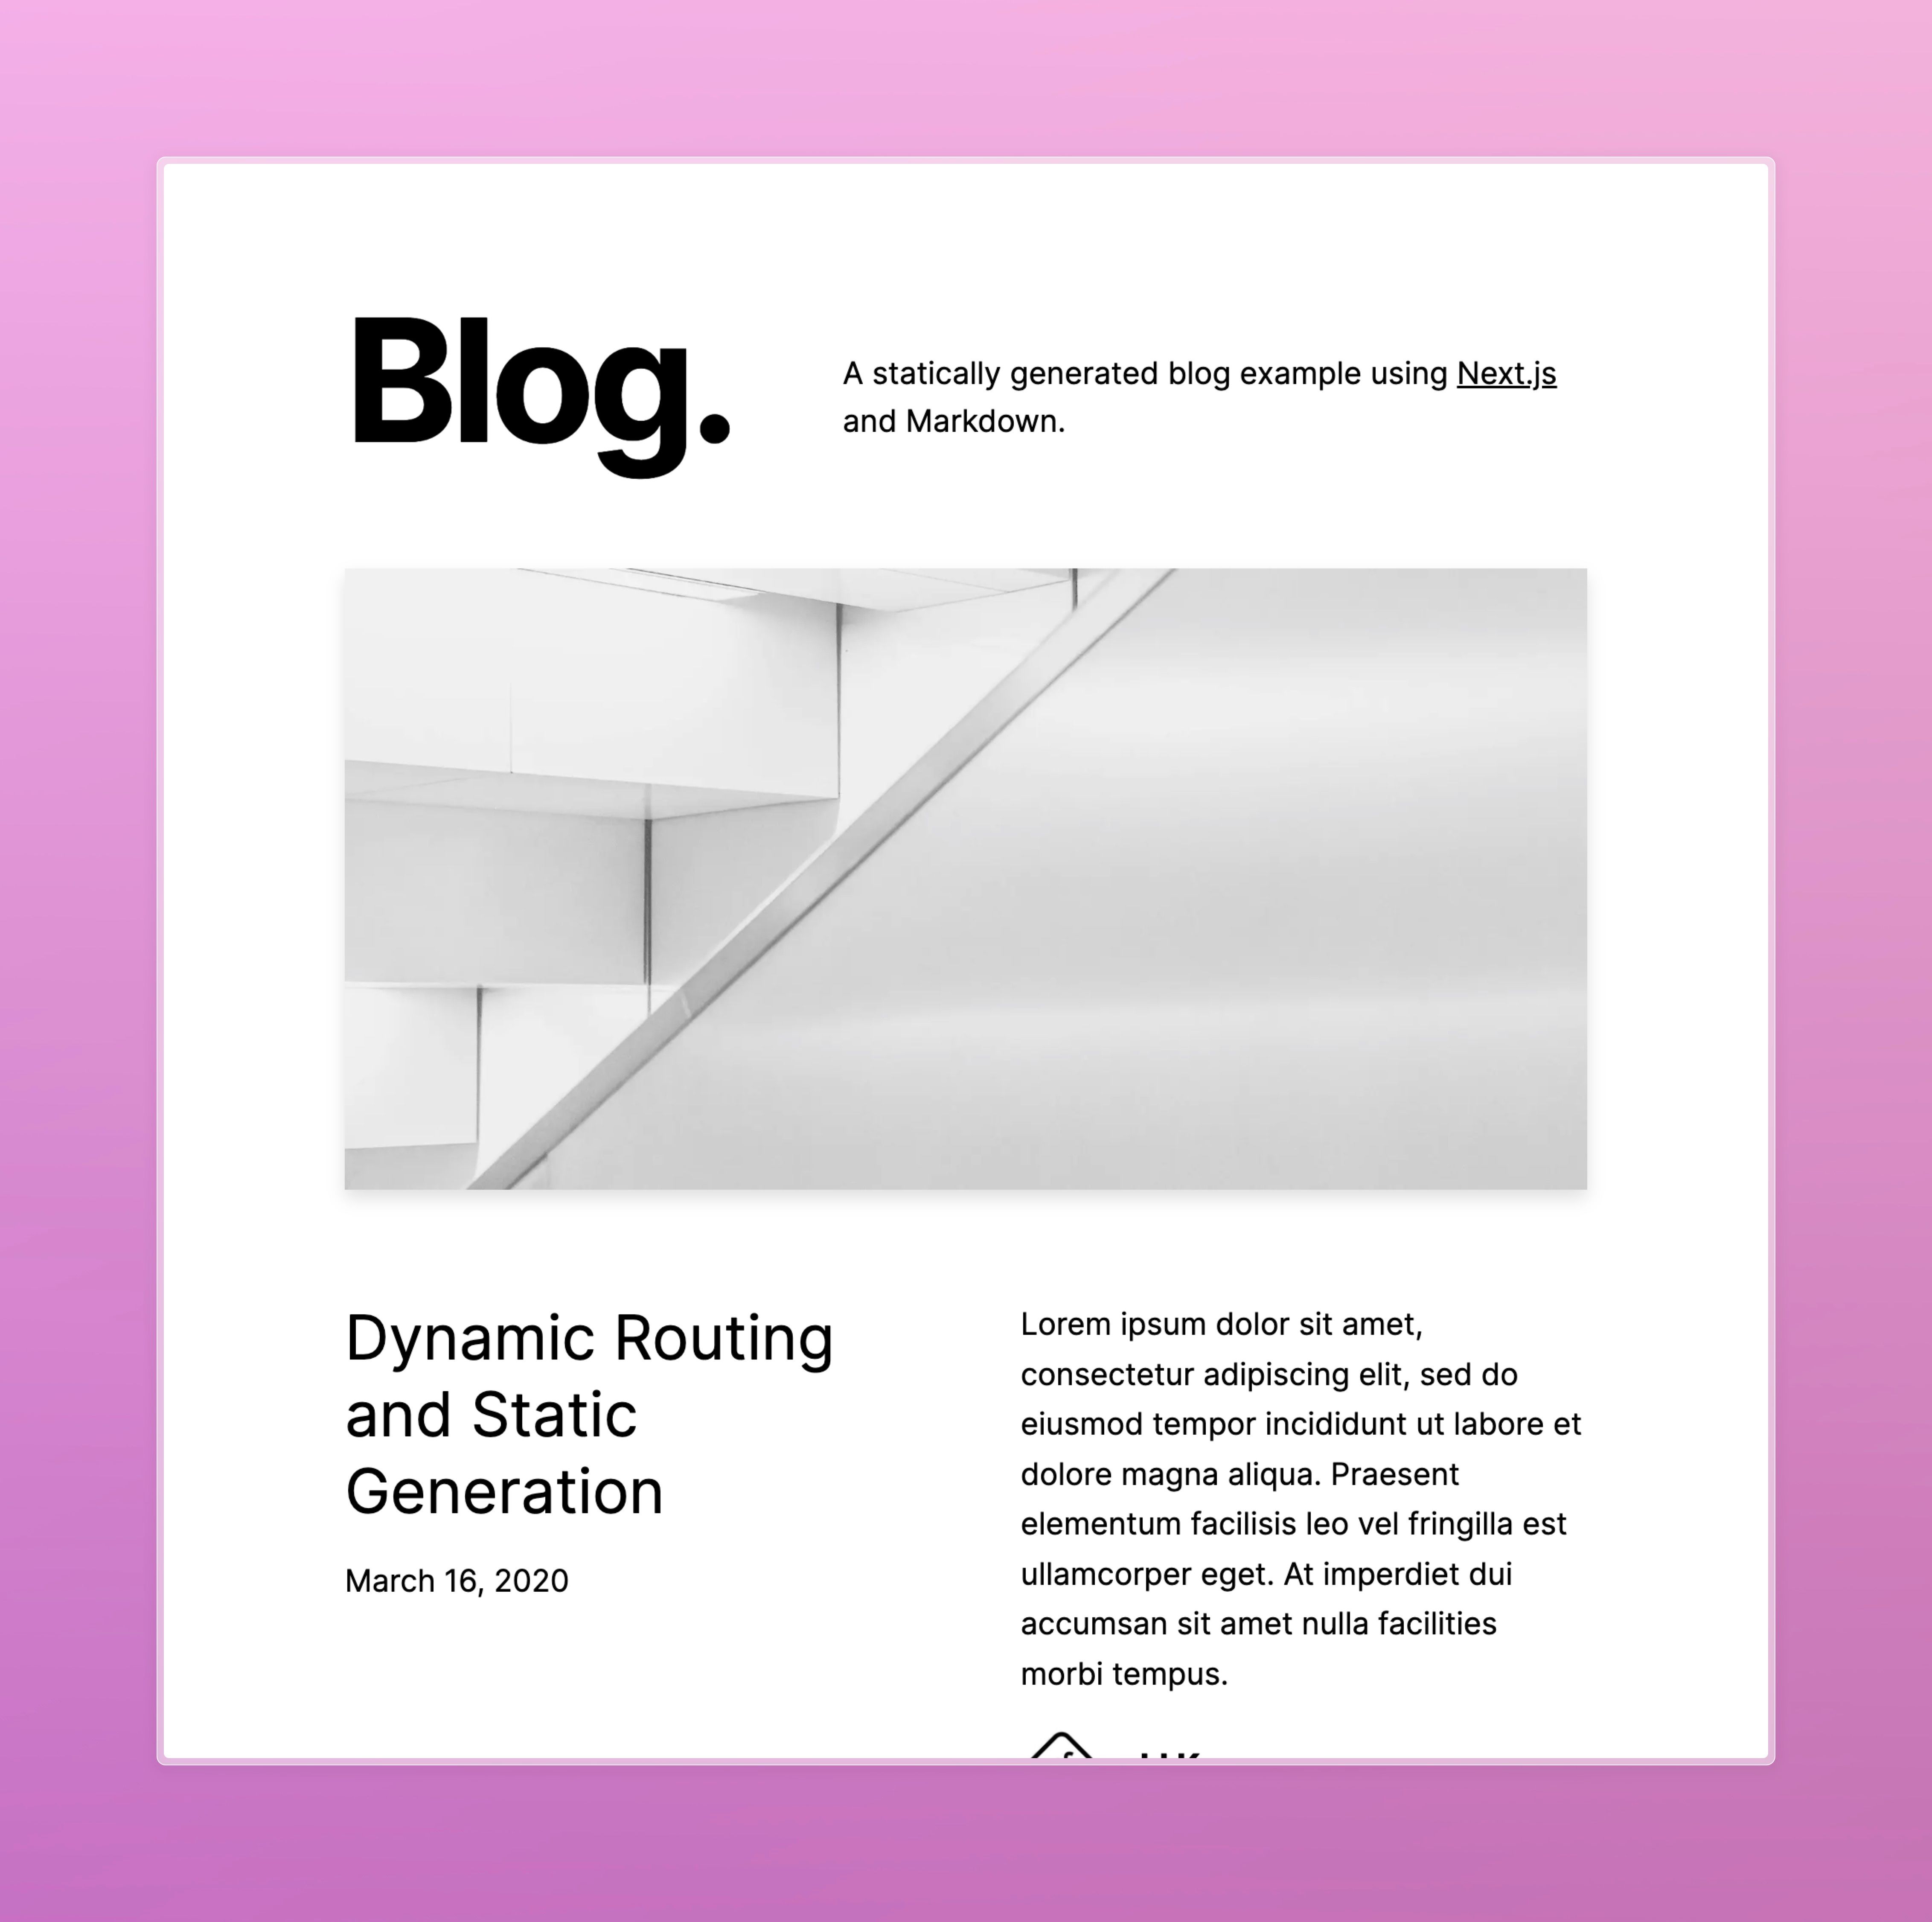
npx create-next-app --example blog-starter blog-starter-app
Now we have the Next 14 project with a couple of blog pages generated from the local file system. Peek into the _posts directory to see more!
npm run dev
Launch the app and see your simple project live on localhost!
Extending Next project
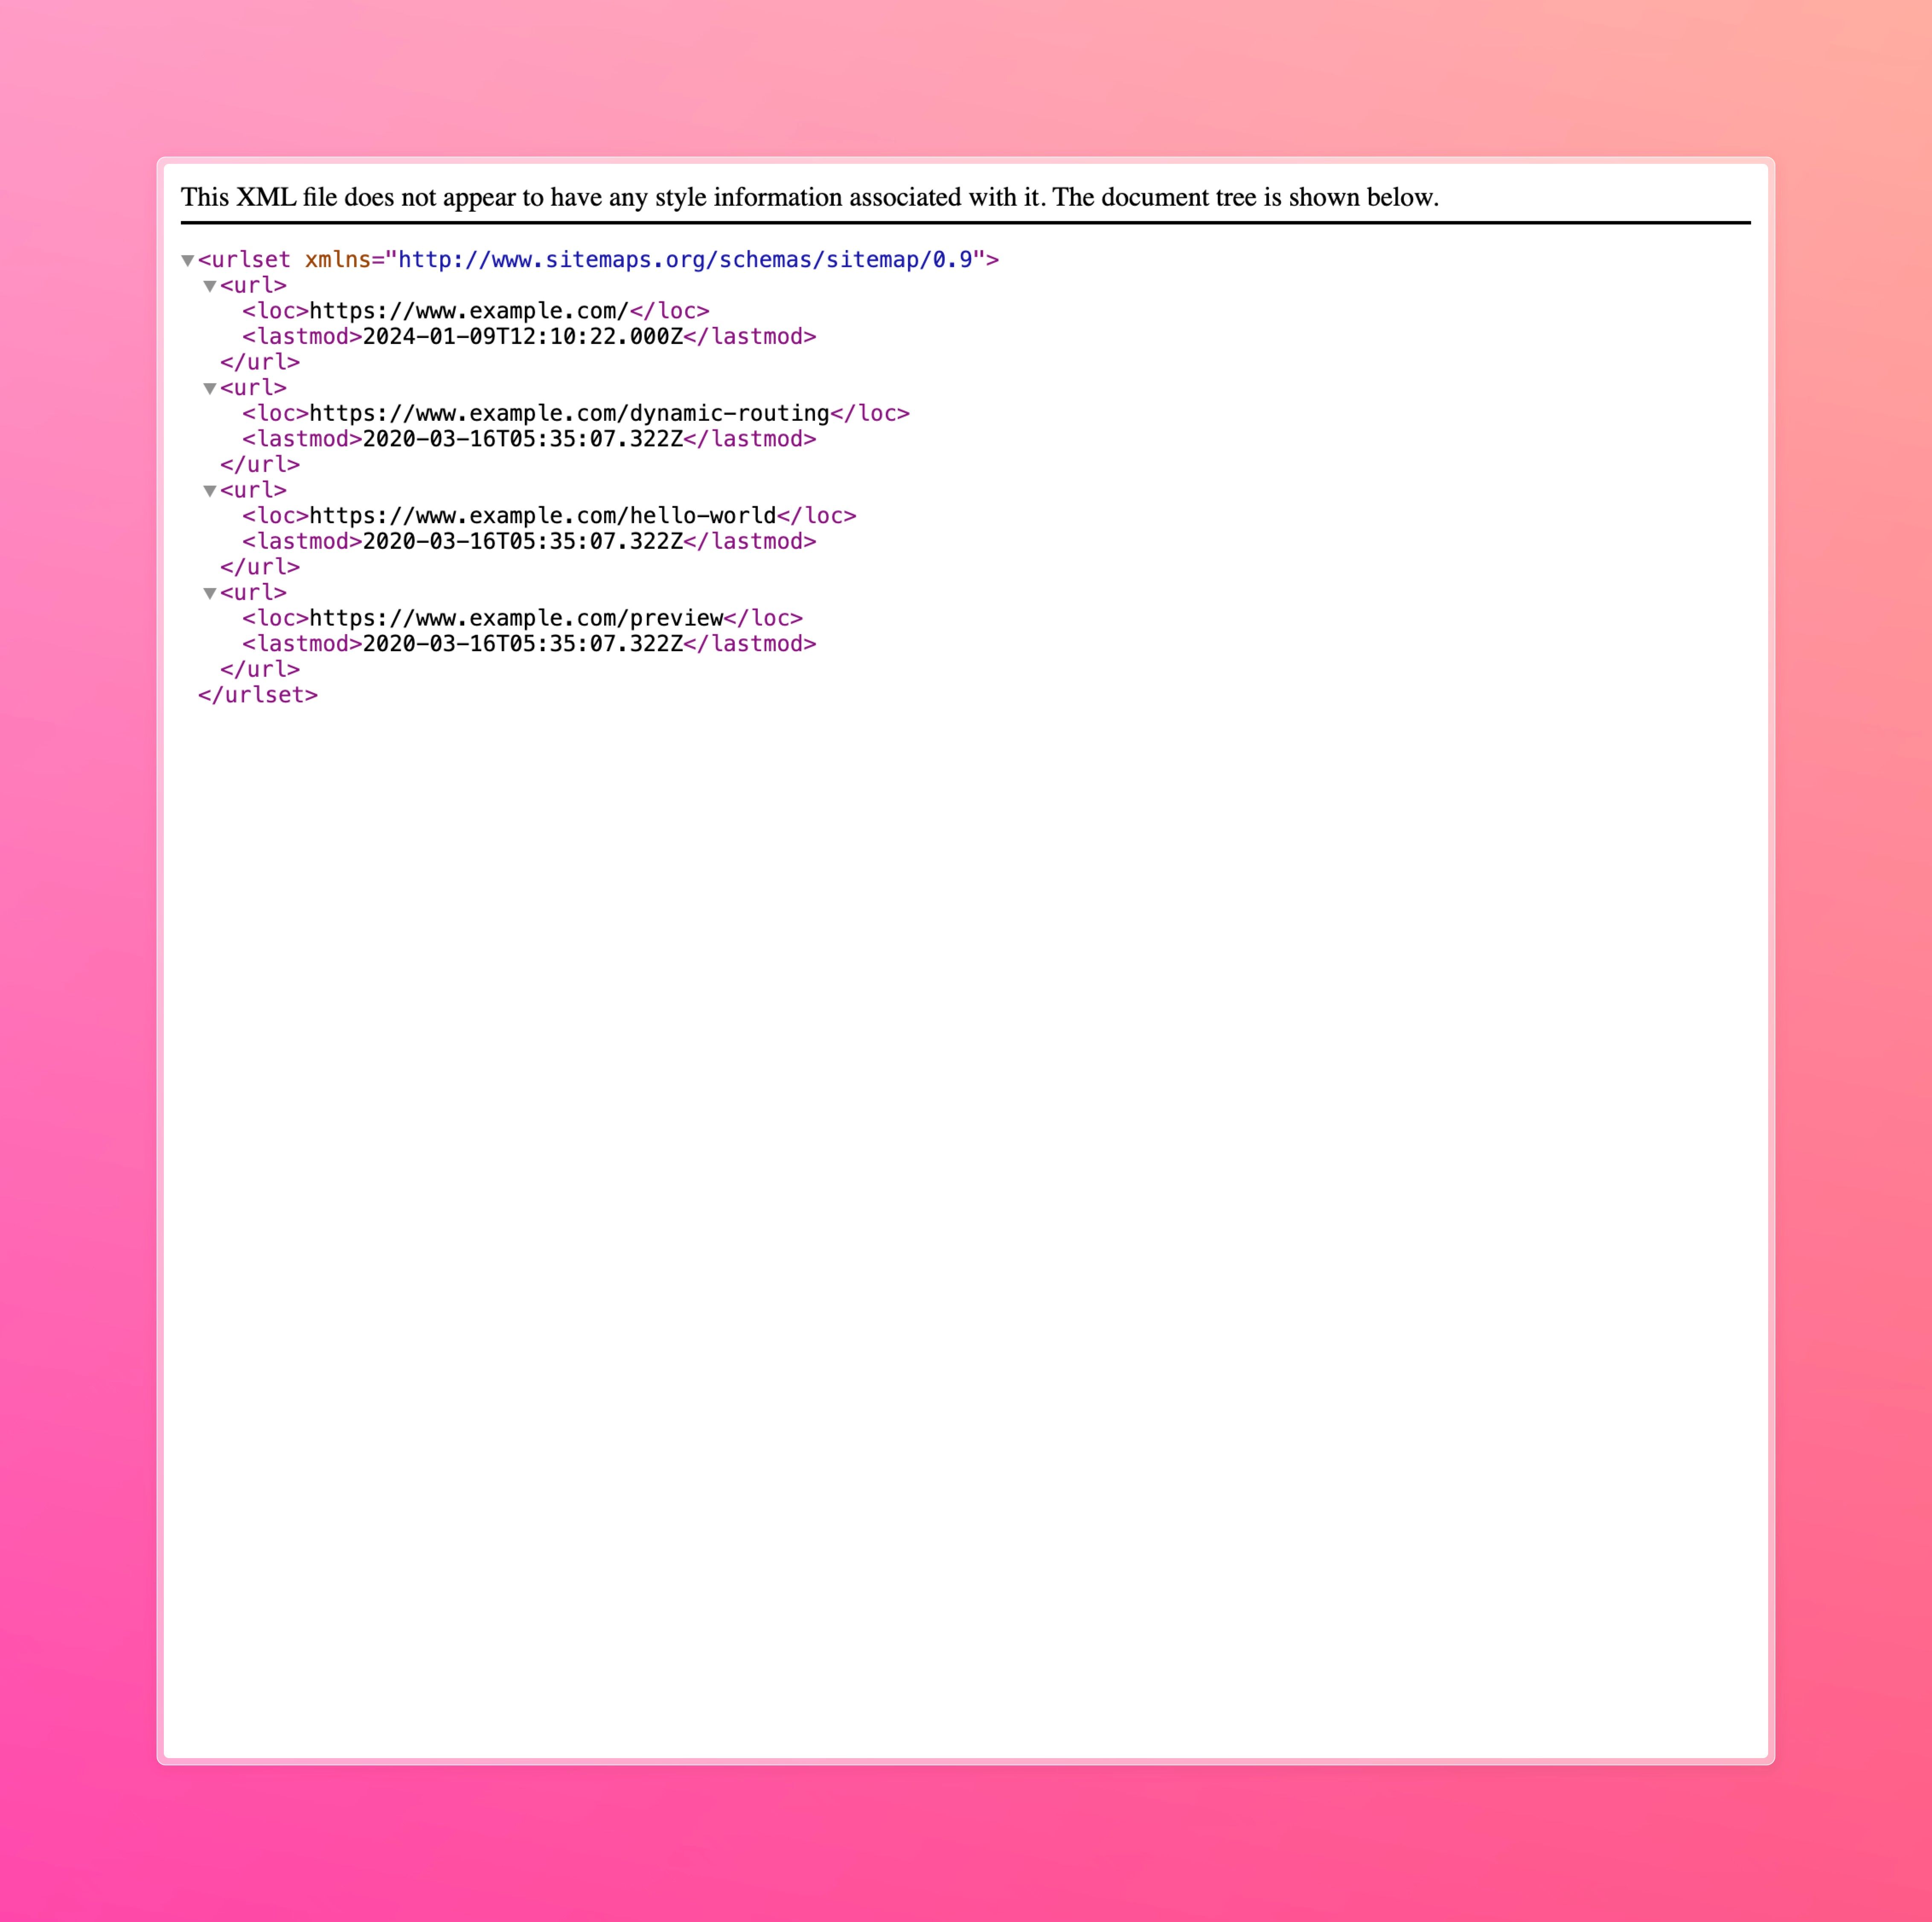
To fully automate everything we are missing one thing in the starter template. There is no sitemap that outlines the list of pages the website has.
Lost Pixel integrates well with dynamic sitemaps meaning you will never have to manually input what pages you want tested if you have sitemap.xml available.
Next.js allows a really simple way of adding a dynamic sitemap to your website, so let’s utilize that.
import { getAllPosts } from "@/lib/api";
import { MetadataRoute } from "next";

async function getPages() {
  const baseUrl = "https://www.example.com";

  try {
    const indexPage = {
      url: "https://www.example.com/",
      date_modified: "2024-01-09T12:10:22Z",
    };
    const posts = await getAllPosts();

    const postPages = posts.map((post) => ({
      url: `${baseUrl}/posts/${post.slug}`,
      date_modified: post.date,
    }));

    const pages = [indexPage, ...postPages];
    return pages;
  } catch (error) {
    return [];
  }
}

export default async function sitemap(): Promise<MetadataRoute.Sitemap> {
  const pages = await getPages();
  return [
    ...pages.map((page) => ({
      url: page.url,
      lastModified: page.date_modified
        ? new Date(page.date_modified)
        : new Date(),
    })),
  ];
}
We created sitemap.ts file in our app directory and included the logic to dynamically construct the sitemap based on the posts in _posts directory.
We are ready to set up our visual tests now!
Lost Pixel Platform
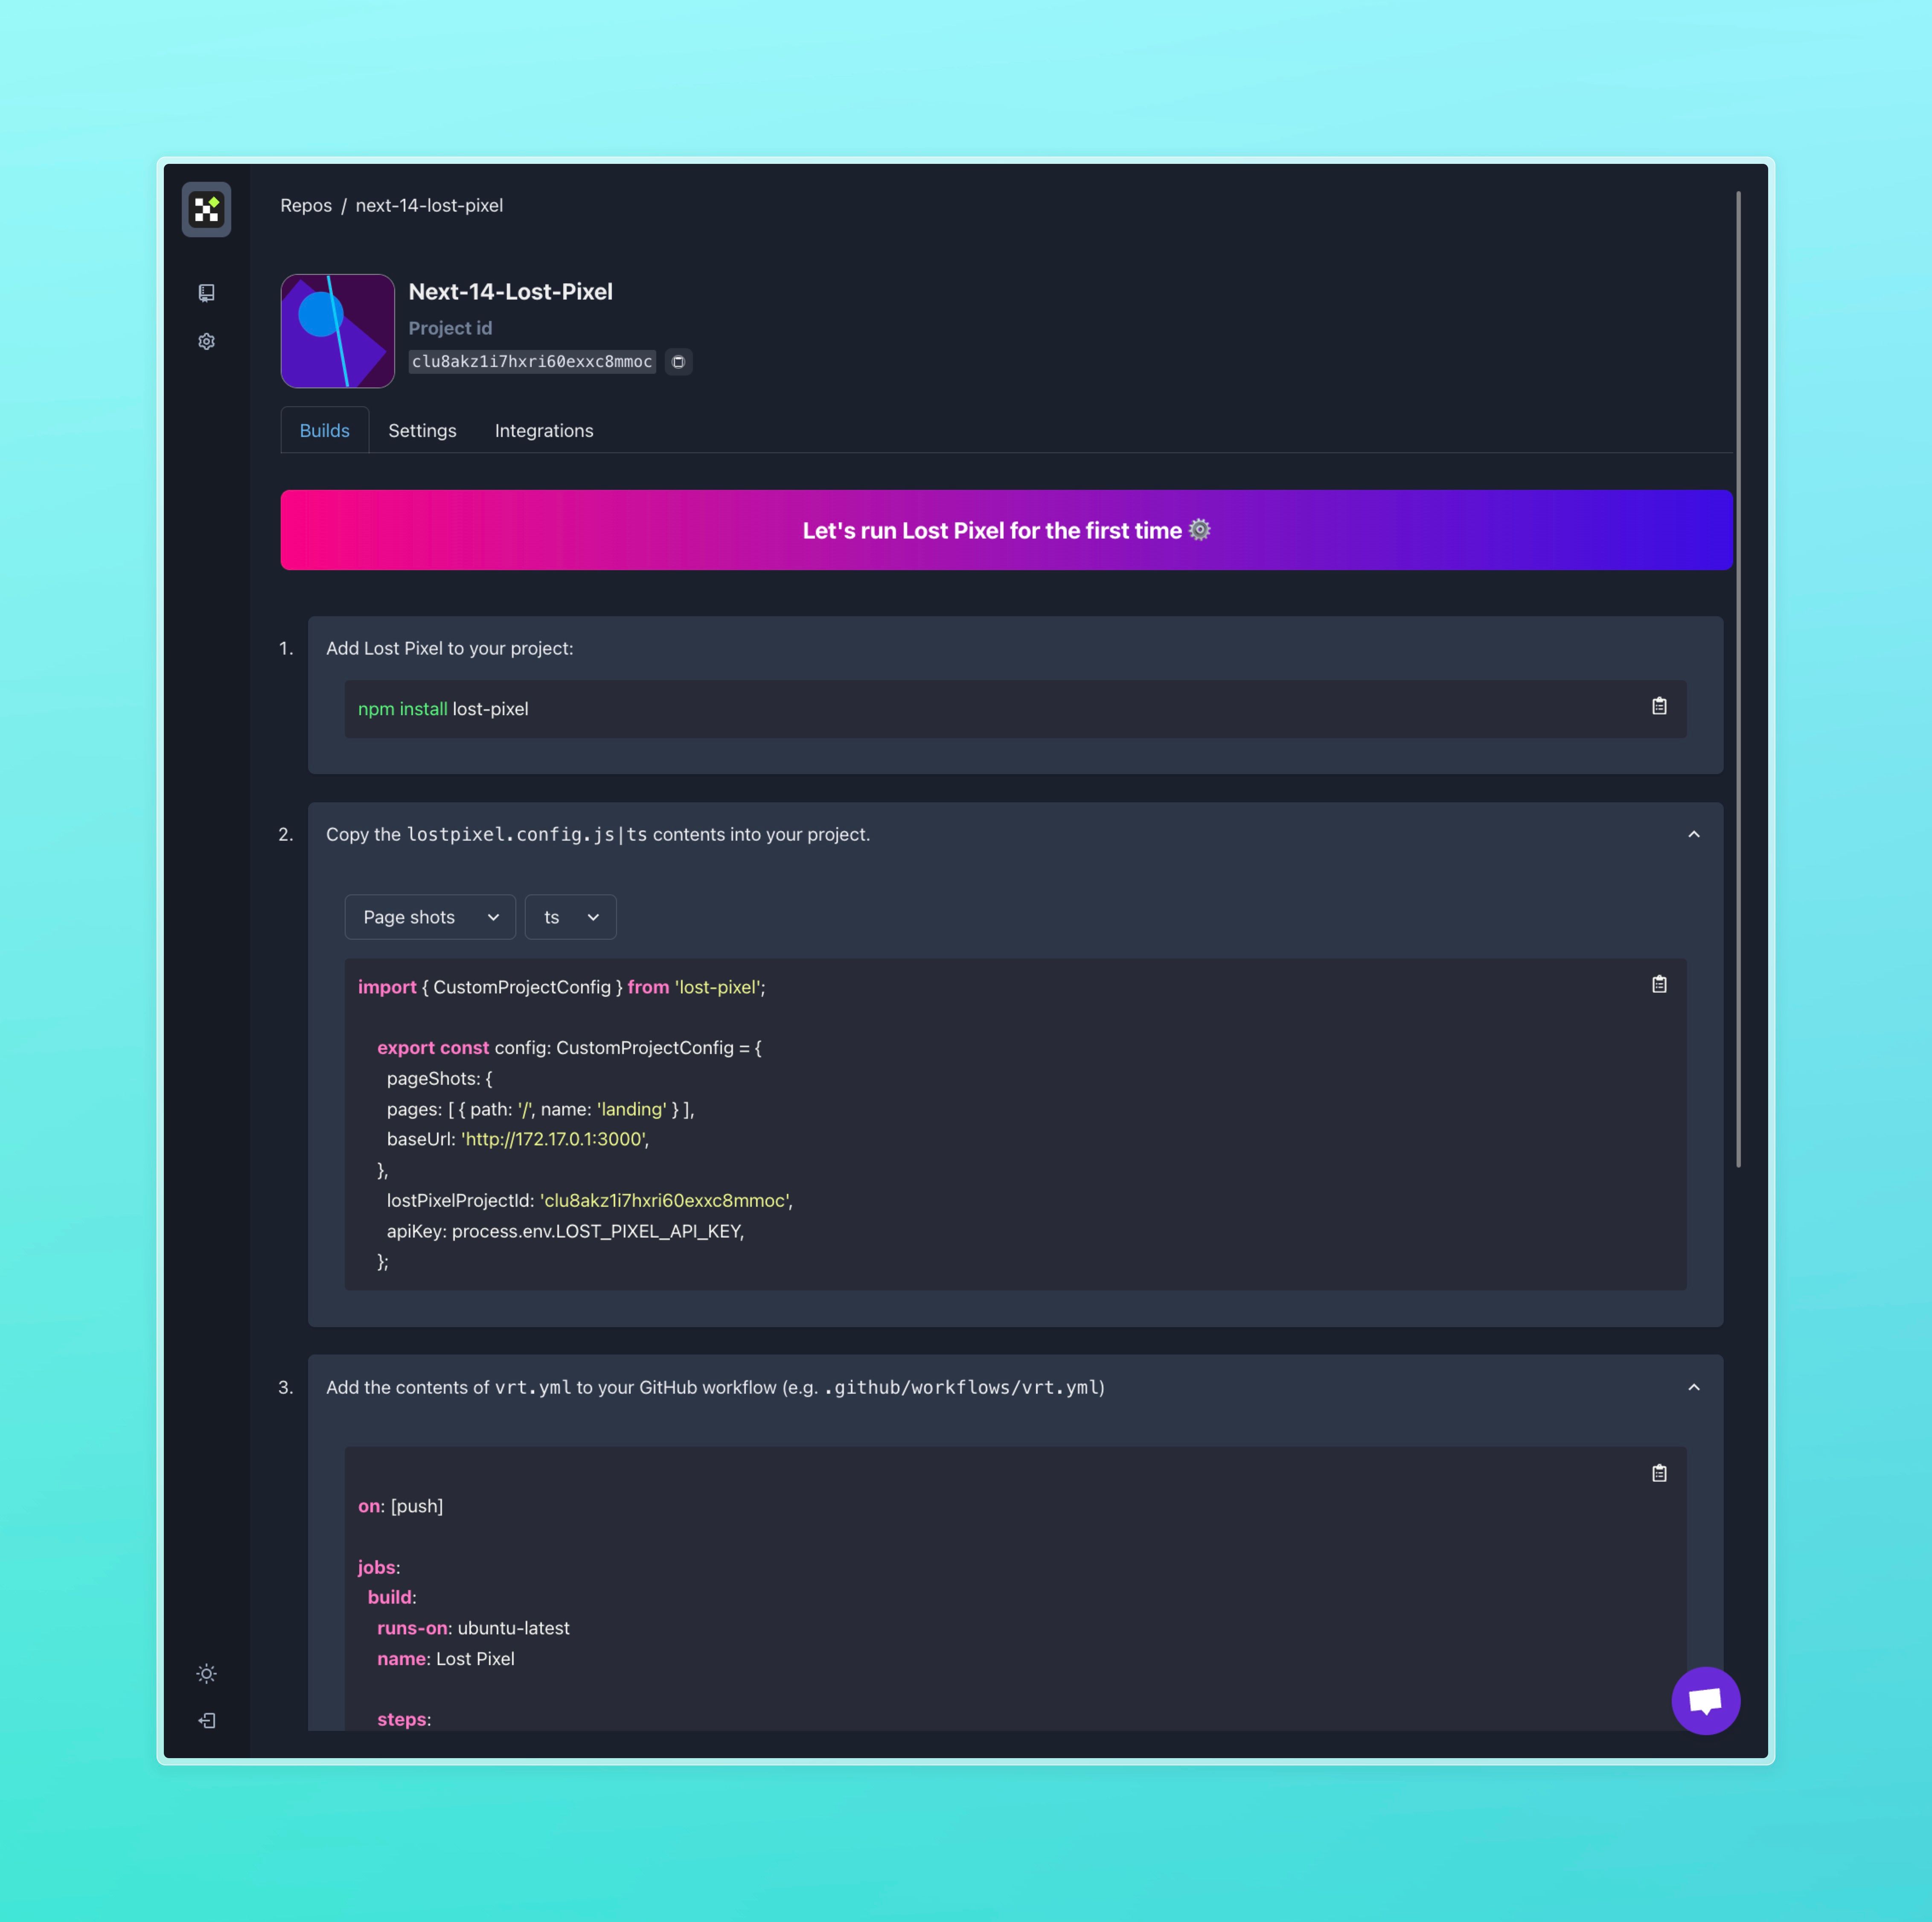
After completing the onboarding on Lost Pixel Platform and installing the lost-pixel app on your repositories you are ready to move through a couple of simple steps to wrap up our integration.
npm install lost-pixel
Let’s create lostpixel.config.ts file and populate it with the following content:
import { CustomProjectConfig } from 'lost-pixel';

    export const config: CustomProjectConfig = {
      pageShots: {
				pages: [],
				pagesJsonUrl: './lost-pixel-pages.json',
				baseUrl: 'http://172.17.0.1:3000',
				breakpoints: [640, 1024],
	    },
      lostPixelProjectId: 'YOUR_PROJECT_ID',
      apiKey: process.env.LOST_PIXEL_API_KEY,
    };
Make sure you are using your lostPixelProejctId that you can find in your onboarding.
This setup sources the pages that we want to test from the JSON file that we will generate automatically from the sitemap in our CI run.
GitHub action
We are done with the Lost Pixel setup, now we need to add the
LOST_PIXEL_API_KEY to our GitHub repository secrets.
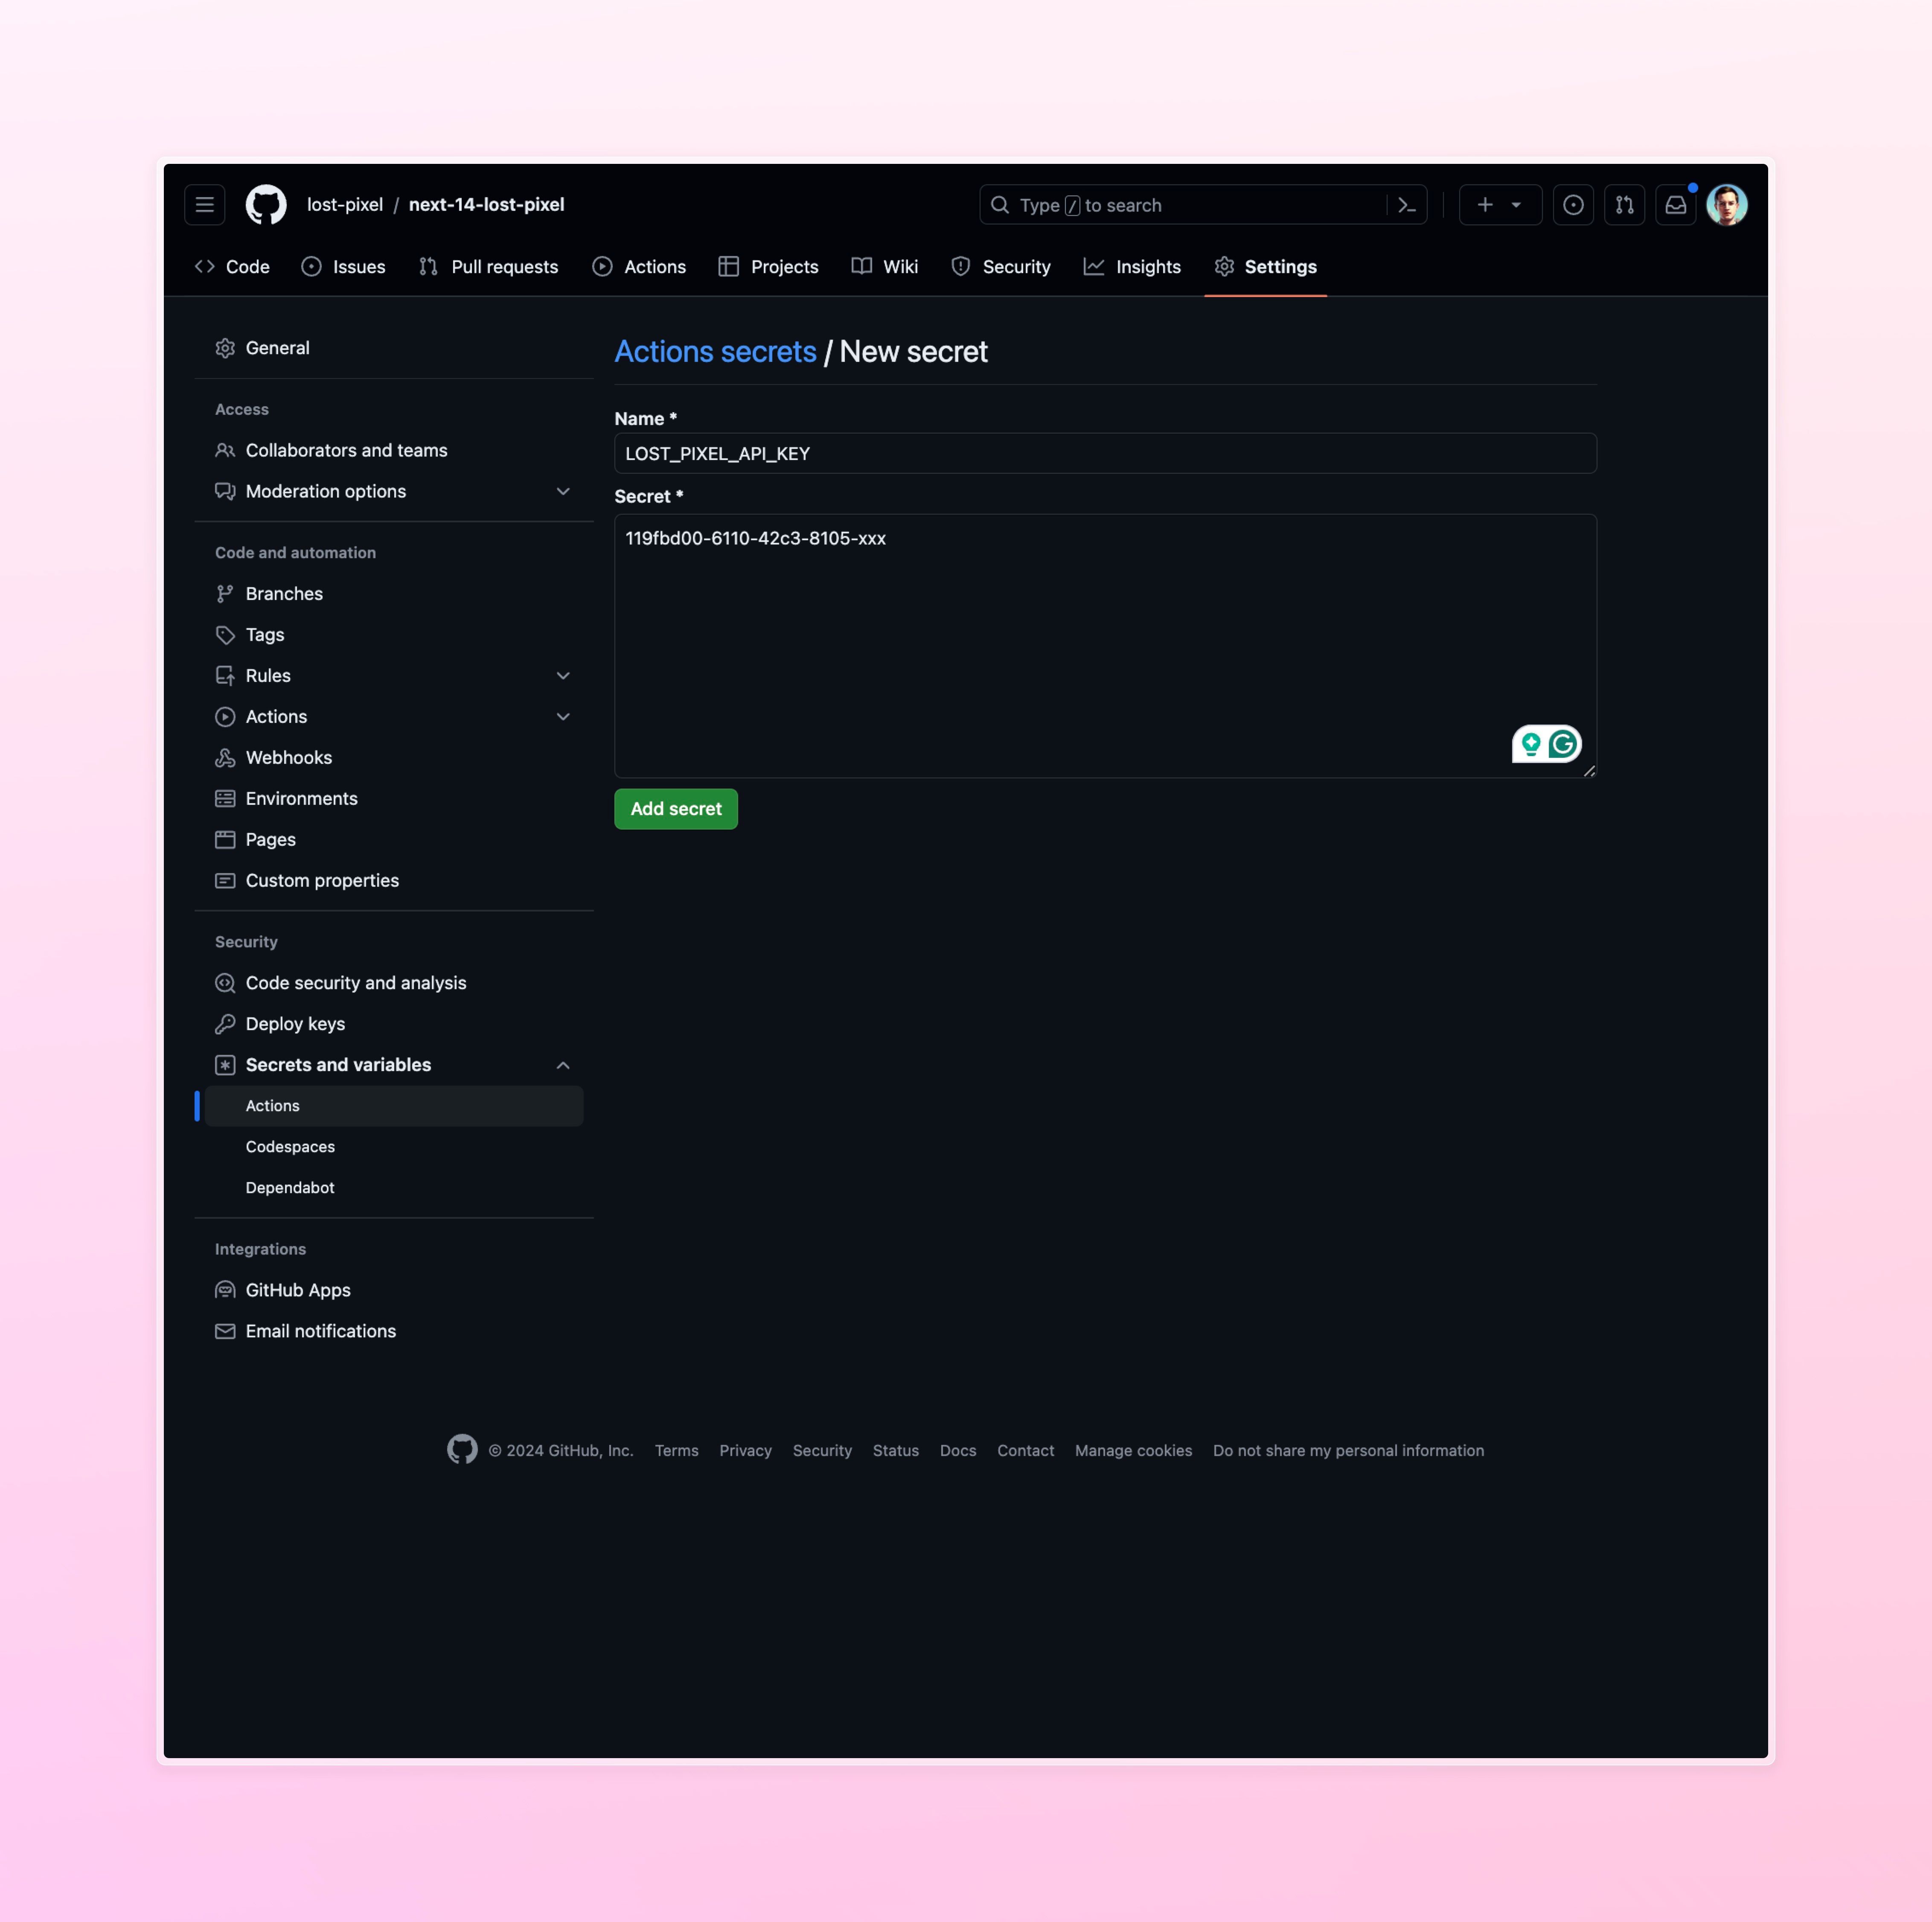
You can find it in your onboarding screen for the repo where you found your lostPixelProejctId
You are ready to create a new GitHub action workflow in your .github/workflows folder. Let’s name it vrt.yml for visual regression testing and paste the following content:
on: [push]

jobs:
  build:
    runs-on: ubuntu-latest
    name: Lost Pixel

    steps:
      - name: Checkout
        uses: actions/checkout@v2

      - name: Setup Node
        uses: actions/setup-node@v3
        with:
          node-version: 18.x

      - name: Install dependencies
        run: npm install

      - name: Build next
        run: npm run build

      - name: Start next
        run: pnpm run start &

      - name: Generate Sitemap
        run: npx lost-pixel page-sitemap-gen http://172.17.0.1:3000/sitemap.xml "./lost-pixel-pages.json"

      - name: Lost Pixel
        uses: lost-pixel/[email protected]
        env:
          LOST_PIXEL_API_KEY: ${{ secrets.LOST_PIXEL_API_KEY }}
All in all, this is a pretty standard GitHub action declaration file that pulls the repo code, installs dependencies, builds the next app, starts the Next app, and runs Lost Pixel tests over it.
The curious part is this one:
      - name: Generate Sitemap
        run: npx lost-pixel page-sitemap-gen http://172.17.0.1:3000/sitemap.xml "./lost-pixel-pages.json"
This will use the lost-pixel sitemap utility to generate the pages to test automatically. Hopefully, at this point, all the dots are connected and we can push this code to the repository.
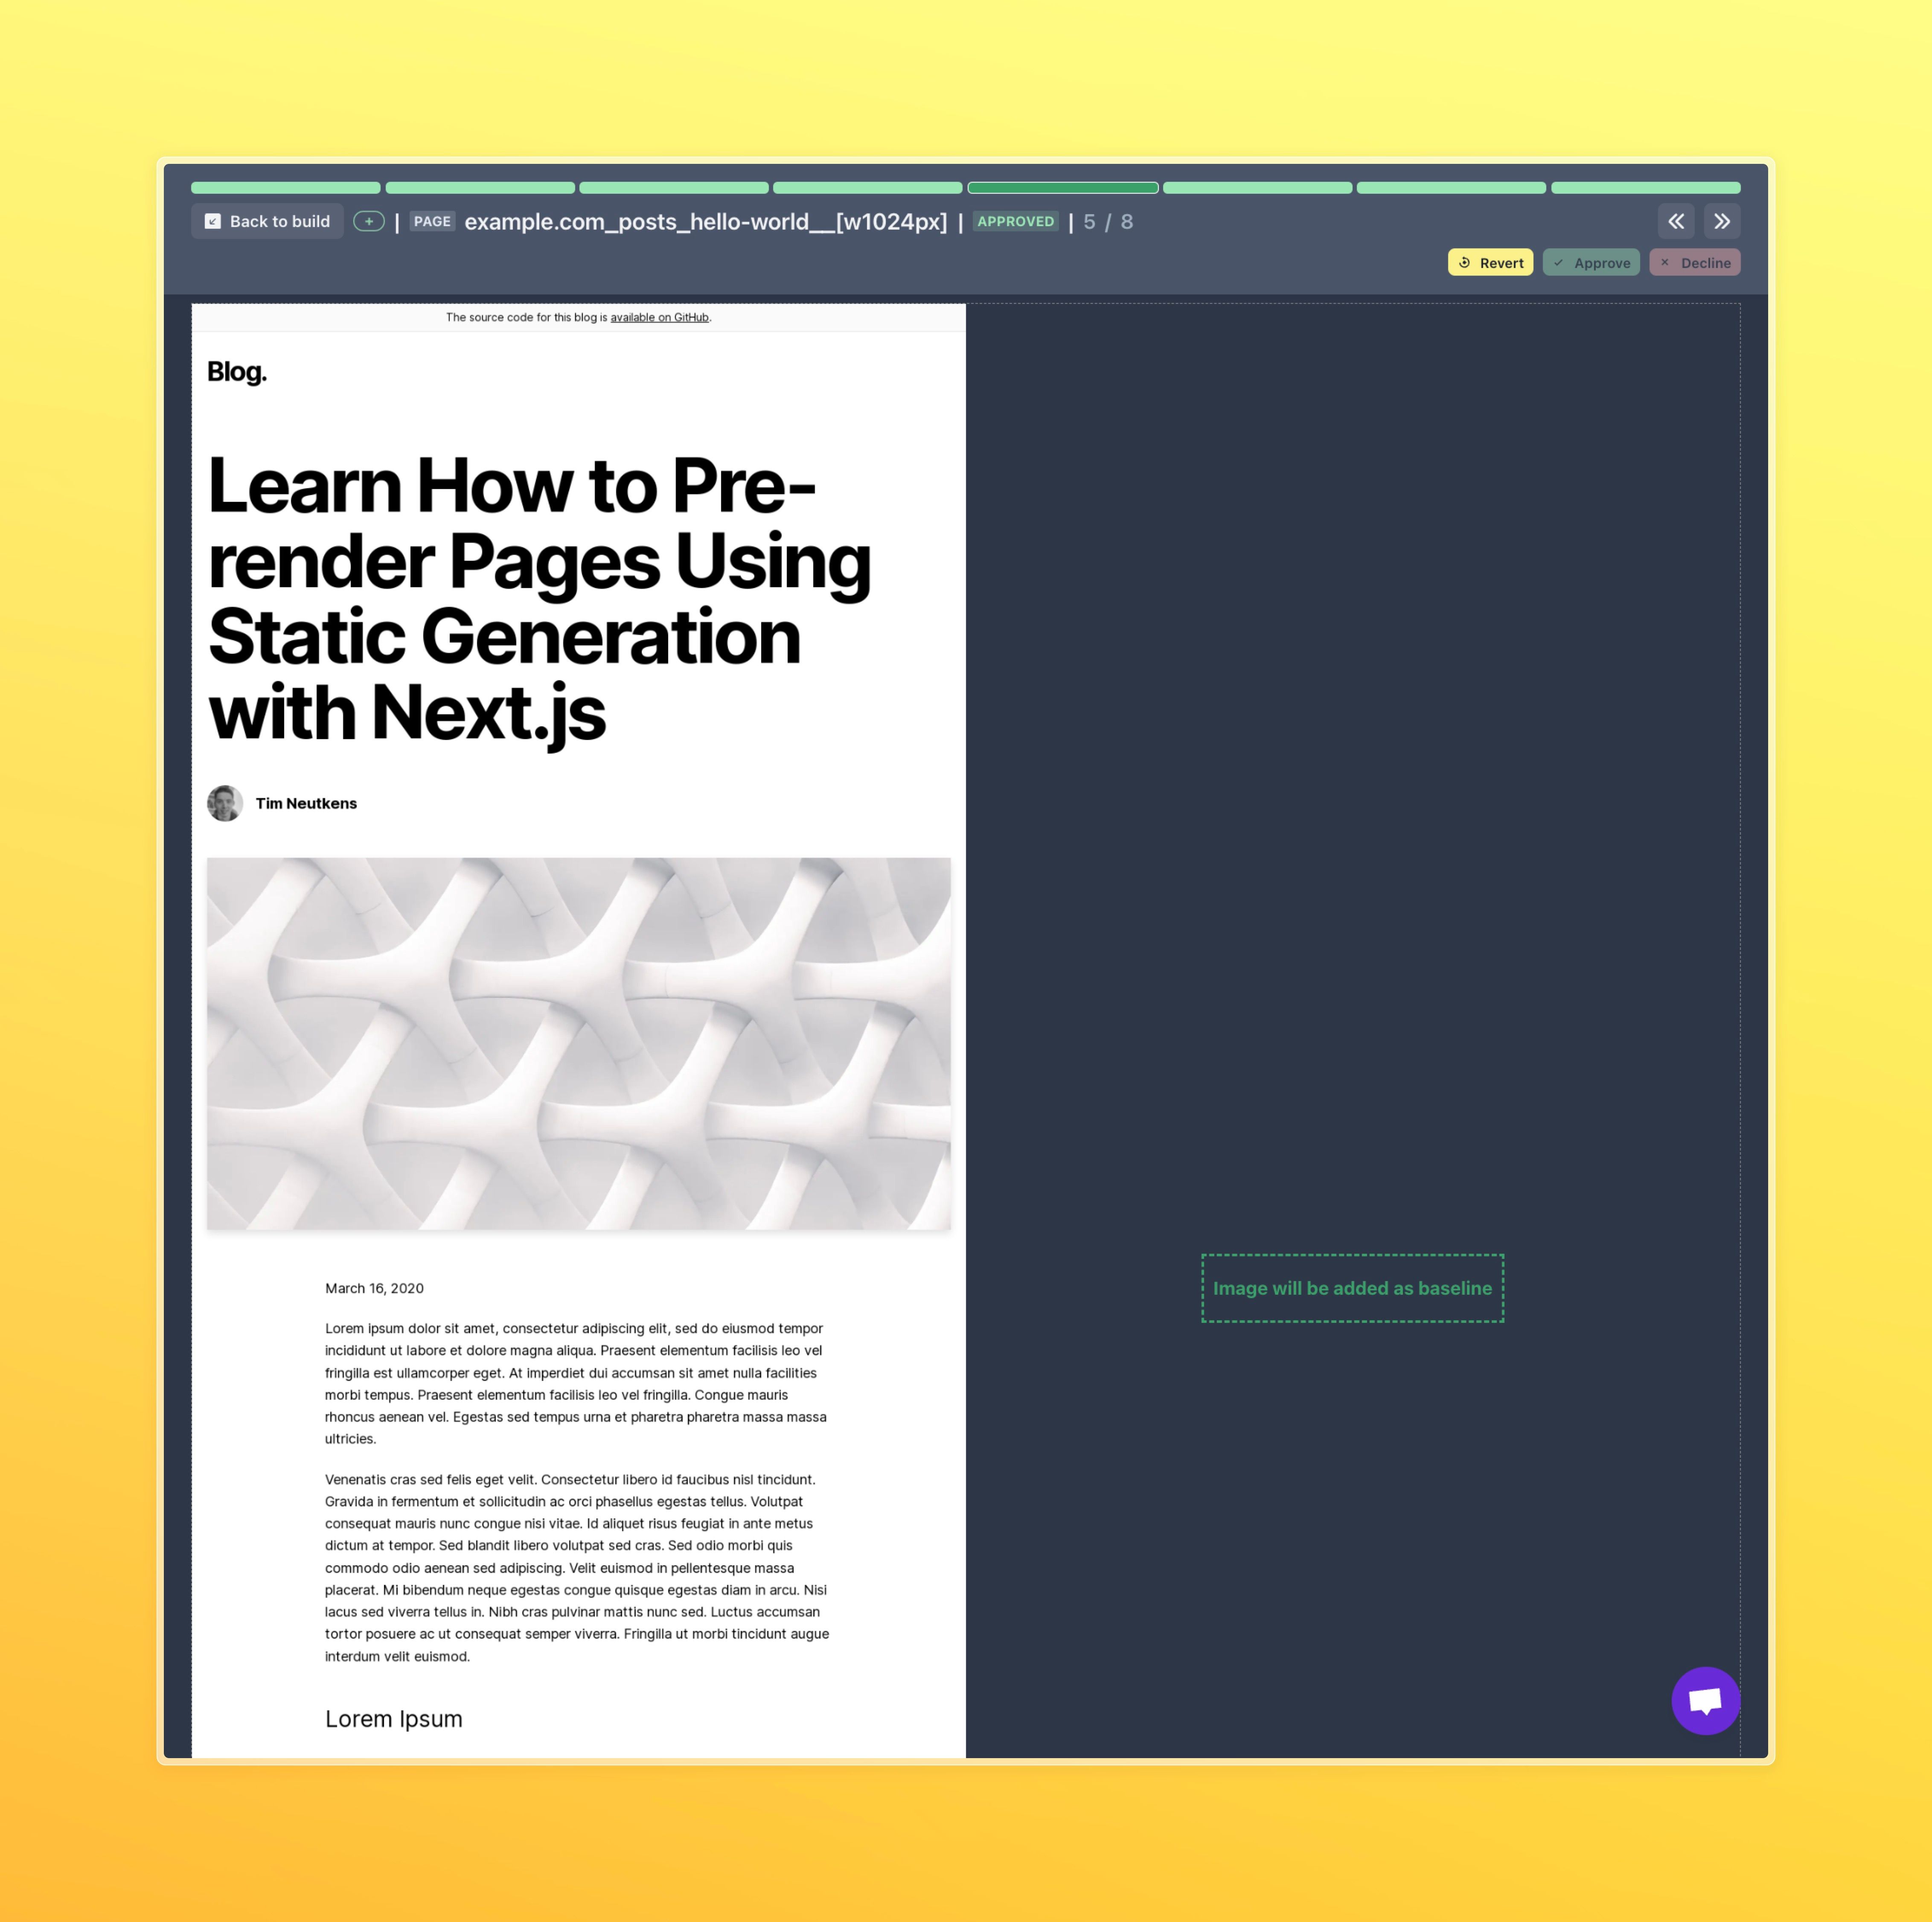
You should end up seeing the visual tests to be approved for two different viewports for all of the pages that we have in the sitemap!
Closing thoughts
This setup allows you to set the visual regression tests once and forget about modifying them, as they will react to the changes in your sitemap.
If you want to exclude some pages or modify the setup for their visual testing(for example exclude some pages from visual testing or reduce flakiness of the tests) you can do that with the help of pagesJsonRefiner:
pages: [],
    pagesJsonUrl: "./lost-pixel-pages.json",
    pagesJsonRefiner: (pages) => pages.filter((page) => page.path !== "/404"),
    baseUrl: "http://172.17.0.1:3000",
    breakpoints: [640, 1024],
With this setup, you will always know if some dependency upgrade has broken your layout, messed up styles or made your pages throw error instead of showing the content.
Set up visual regression tests in minutes with Lost Pixel Platform. Do not let your users find bugs first.

About Dima Ivashchuk
Hey, I'm - Dima the co-founder of Lost Pixel. I like modern frontends, building stuff on the internet, and educating others. I am committed to building the best open-source visual regression testing platform!